Have you ever been pressed for time? I am sure you haven't. I am sure that everyone else but me plans and has their cards made in advance. But just in case you're like me, here is a feature of the Silhouette Cameo that makes card making easy when you're in a pinch.
In the Silhouette Store there are images that are specifically print and cut which means you send them to your printer from your Silhouette Software using the registration marks and then cut them out on your Silhouette Cameo.
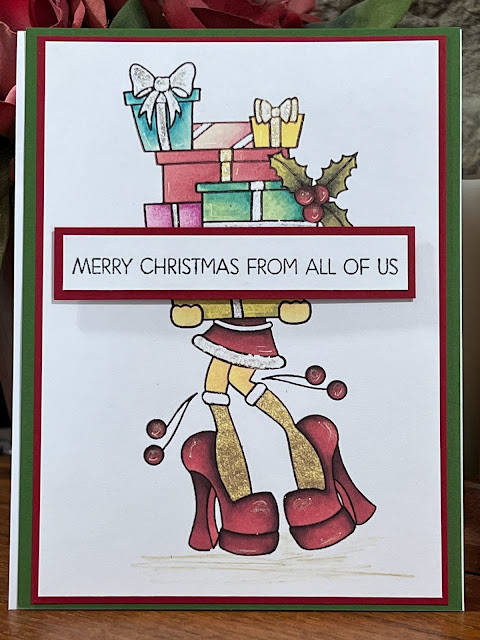
Here is today's example. I used a printable moose from the Silhouette store, DCWV Gilded Paper Stack, Lil'inker's stitched rectangle dies, Taylored Expressions banner dies and Basic Grey gold enamel dots.

This cute fellow has a front:

and a back. I put the back side of the moose on the inside of the card.

He is as cute as can be, but did not take the time that some cuts do. There is no gluing together. You do still have to come up with a card design though. And sometimes that is harder than gluing. LOL
If you're not familiar with the print and cut feature in your Silhouette software - go to the Silhouette store and look for the filters on the left hand side of the screen in The Silhouette Image Store. You can filter on print and cut images to see your selection.
Once you purchase a print and cut image, here are the steps to print and cut it.
First place the image on your software mat. Then turn on the registration marks. It is the box next to the box with the arrows on the tool bar at the top towards the right hand side of your screen. Make sure your image does not touch the registration marks. And make sure your image is no wider than the registration marks are wide. I speak from experience on that one.
Once your image is on the mat within your software and the registration marks are on, click the printer icon on the tool bar at the top of the screen towards the left hand side. That will send the image to your printer. I always use a heavier card stock for print and cut images.
Once your image has printed, place the paper on the mat without cropping. Feed the image into your Silhouette machine. Click the send to Silhouette icon on the far right of the tool bar across the top of your Silhouette software screen. Your Silhouette will use the regristration marks to determine where to cut.
Stay tuned. More print and cut images coming your way.
Would you use the print and cut feature? Or are you old school? Do you feel like it's cheating?
Thank you for stopping by. Have a great day and be inspired.
April
1 Chronicles 16:34 Give thanks to the Lord, for he is good; his love endures forever.
In the Silhouette Store there are images that are specifically print and cut which means you send them to your printer from your Silhouette Software using the registration marks and then cut them out on your Silhouette Cameo.
Here is today's example. I used a printable moose from the Silhouette store, DCWV Gilded Paper Stack, Lil'inker's stitched rectangle dies, Taylored Expressions banner dies and Basic Grey gold enamel dots.
This cute fellow has a front:
and a back. I put the back side of the moose on the inside of the card.
He is as cute as can be, but did not take the time that some cuts do. There is no gluing together. You do still have to come up with a card design though. And sometimes that is harder than gluing. LOL
If you're not familiar with the print and cut feature in your Silhouette software - go to the Silhouette store and look for the filters on the left hand side of the screen in The Silhouette Image Store. You can filter on print and cut images to see your selection.
Once you purchase a print and cut image, here are the steps to print and cut it.
First place the image on your software mat. Then turn on the registration marks. It is the box next to the box with the arrows on the tool bar at the top towards the right hand side of your screen. Make sure your image does not touch the registration marks. And make sure your image is no wider than the registration marks are wide. I speak from experience on that one.
Once your image is on the mat within your software and the registration marks are on, click the printer icon on the tool bar at the top of the screen towards the left hand side. That will send the image to your printer. I always use a heavier card stock for print and cut images.
Once your image has printed, place the paper on the mat without cropping. Feed the image into your Silhouette machine. Click the send to Silhouette icon on the far right of the tool bar across the top of your Silhouette software screen. Your Silhouette will use the regristration marks to determine where to cut.
Stay tuned. More print and cut images coming your way.
Would you use the print and cut feature? Or are you old school? Do you feel like it's cheating?
Thank you for stopping by. Have a great day and be inspired.
April
1 Chronicles 16:34 Give thanks to the Lord, for he is good; his love endures forever.


No comments:
Post a Comment